AFTER EFFECTS MOVIE PRODUCTION
Create a movie using Adobe After Effects
After Effects is software that combines digital media (text,images,movies,audio) to create "motion graphics" for all movies & tv ads. After Effects is made by Adobe, the same people who make Photoshop. Use After Effects to create your own movie trailer that has motion graphics. This video is an example of motion graphics.
MEDIA CONTENT MANAGEMENT
IMPORTANT: You must save all your movie files in the correct folder.
Create a new folder in your My Documents. Name it: Junior Digital Movie.
SAVE ALL YOUR FILES IN THIS FOLDER. If you dont your movie will not render & you will will have no movie.
Name all movie files correctly. Example; If your using a picture of an apple, name your file apple.jpeg
TASK #1: AFTER EFFECTS SETTINGS
***Set your After Effects settings by follow these instruction images exactly***
1: start > all programs > adobe after effects CC 2017
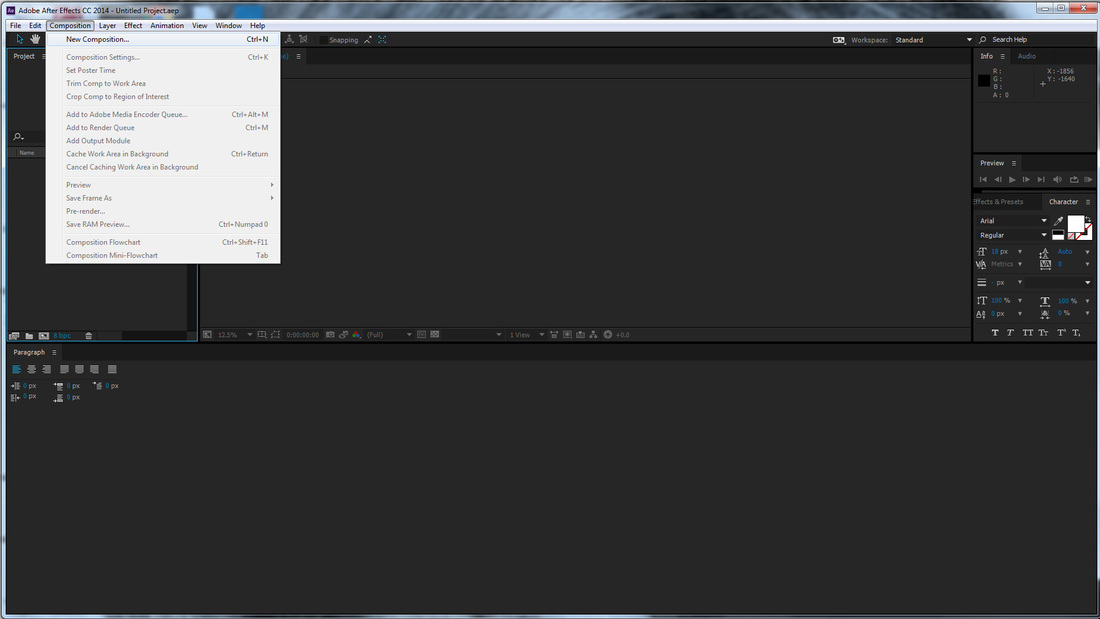
2. composition > new composition
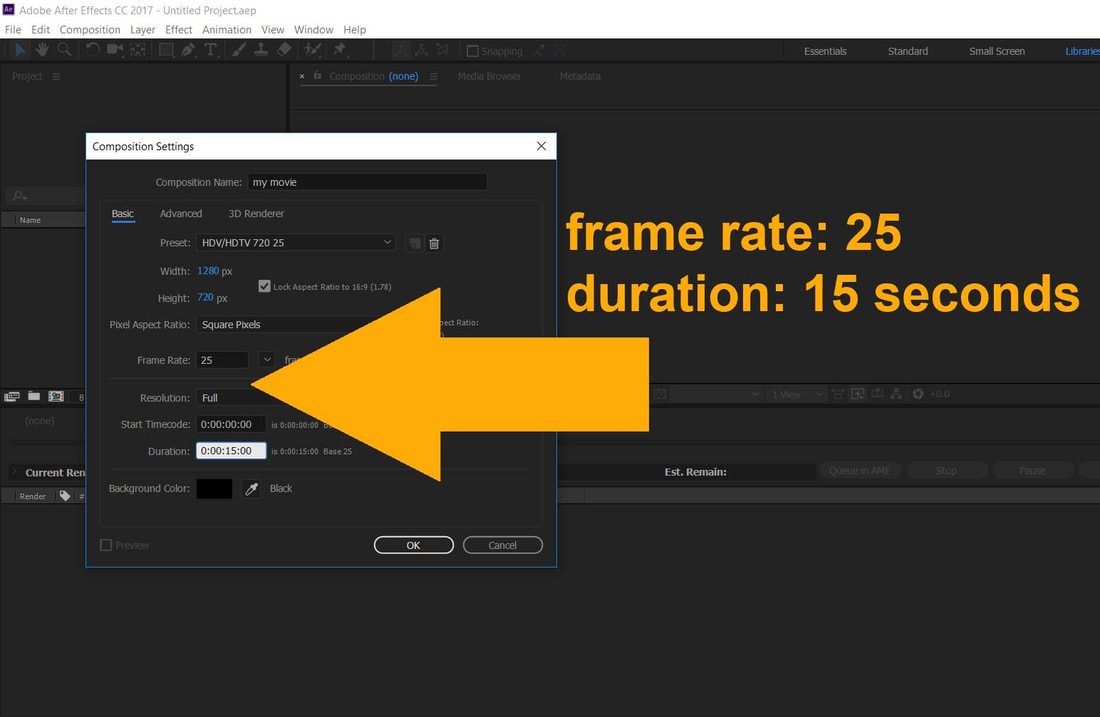
3: composition name > type "my movie"
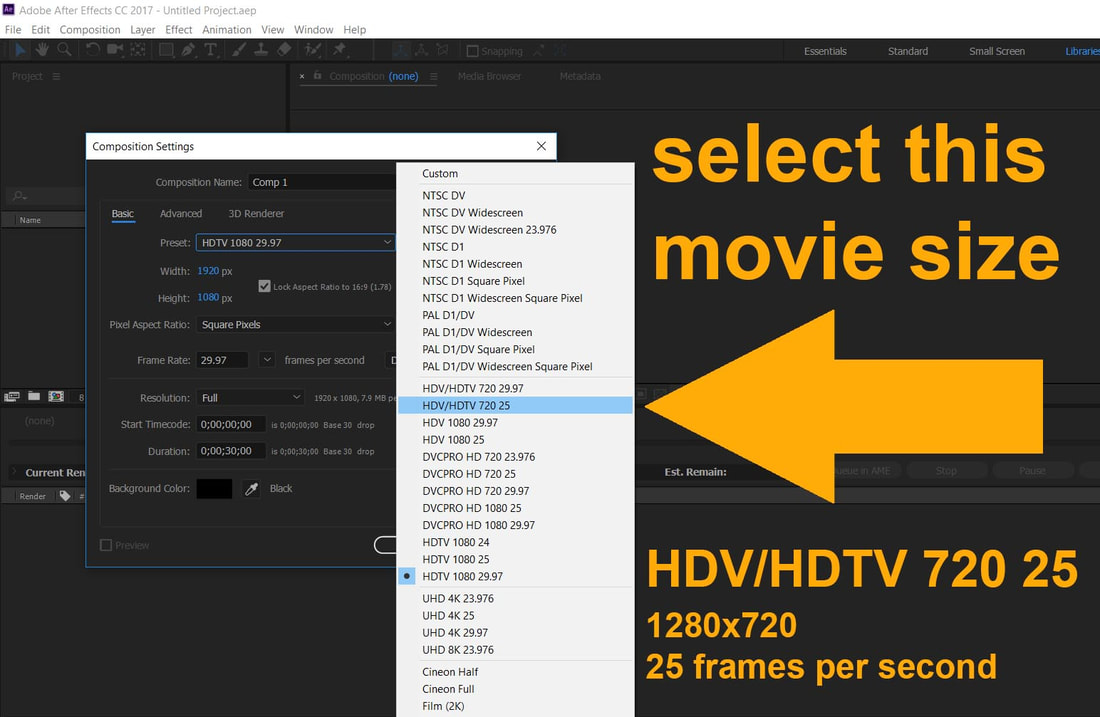
4: preset dropdown > HDV/HDTV 720 25
5: frame rate > 25
6: duration > 15 seconds
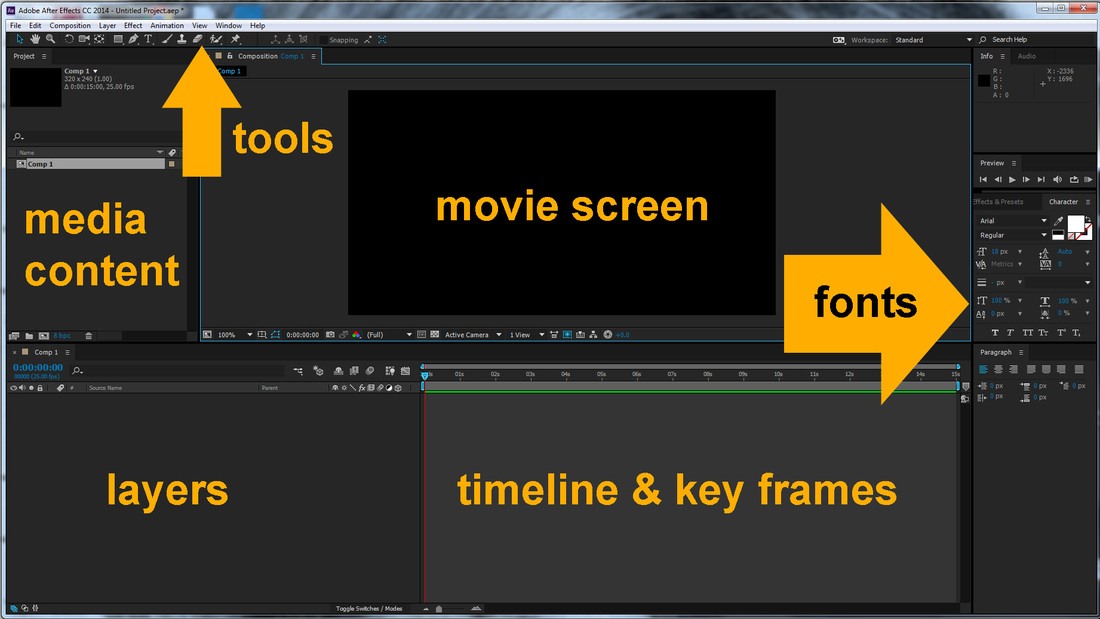
7: this is the After Effects interface. These 6 software features let you control your digital media
8: you need to learn how to use each feature so you can create your movie
9: the first feature to learn about is "layers"
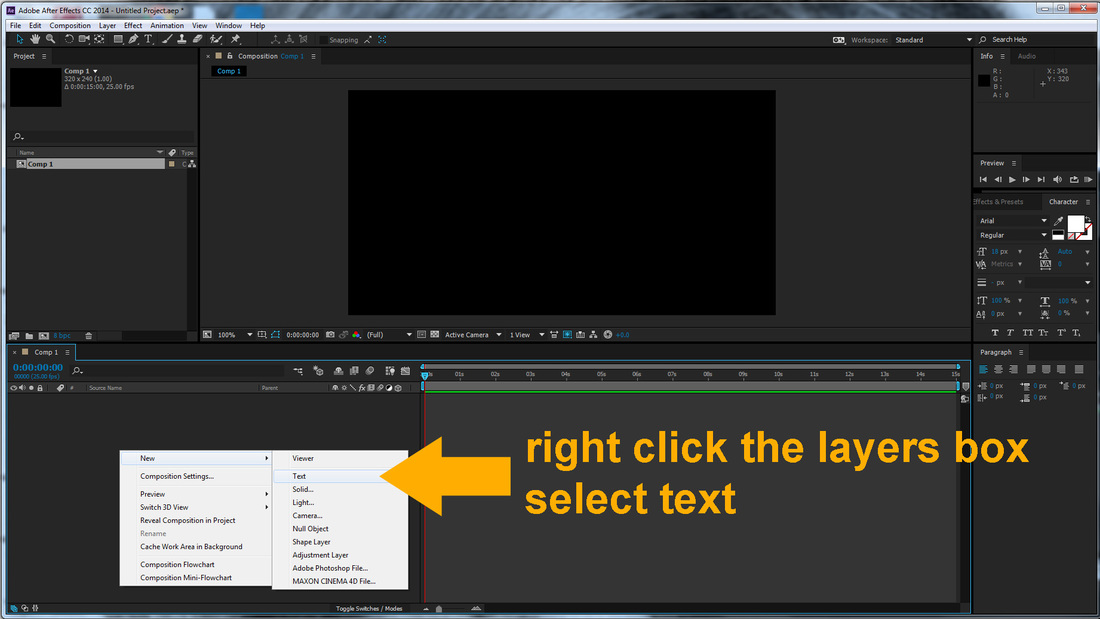
10: right click the layers box
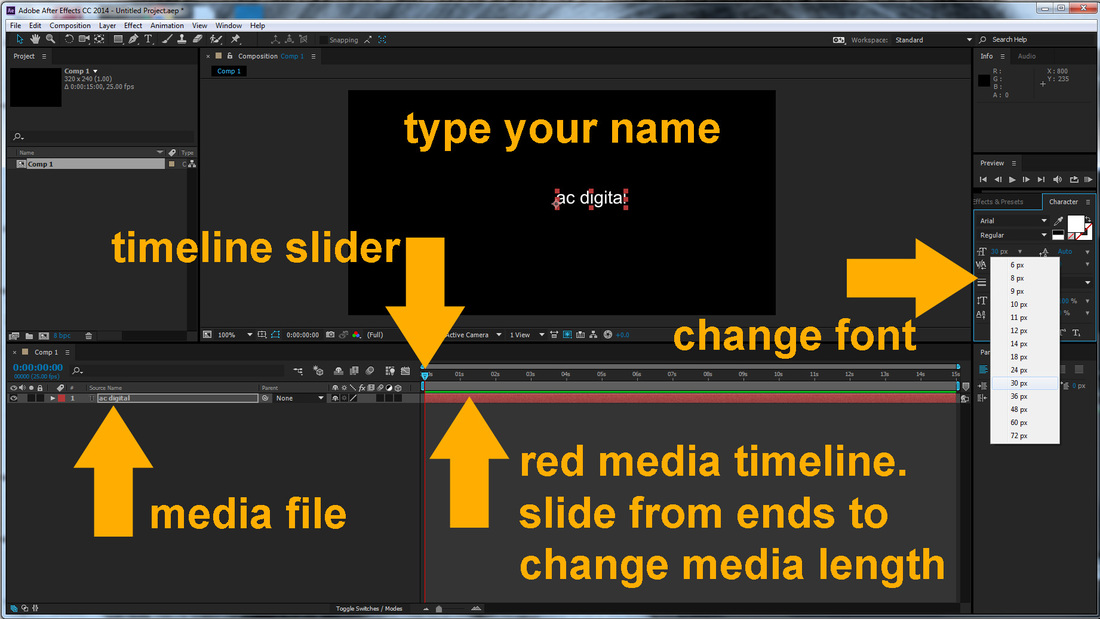
11: select text and type your name on the movie screen
12: on the right of the screen is the "fonts" panel
13: change the text font & size & colour to what you want
14: you can change the time length of your text media file by sliding the red bar from either end
15: use the little blue timeline arrow to slide to any part of the movie
16: click the little white arrowhead of the text file
17: select the "position" option
18: you are going to learn how to animate your name by using "keyframes"

19: click the position stopwatch. you have just set the first "keyframe"
20: you have set the start location of your name. the 6 number digits is the X/Y location of the text
21. you can slide the keyframe to anywhere on the timeline
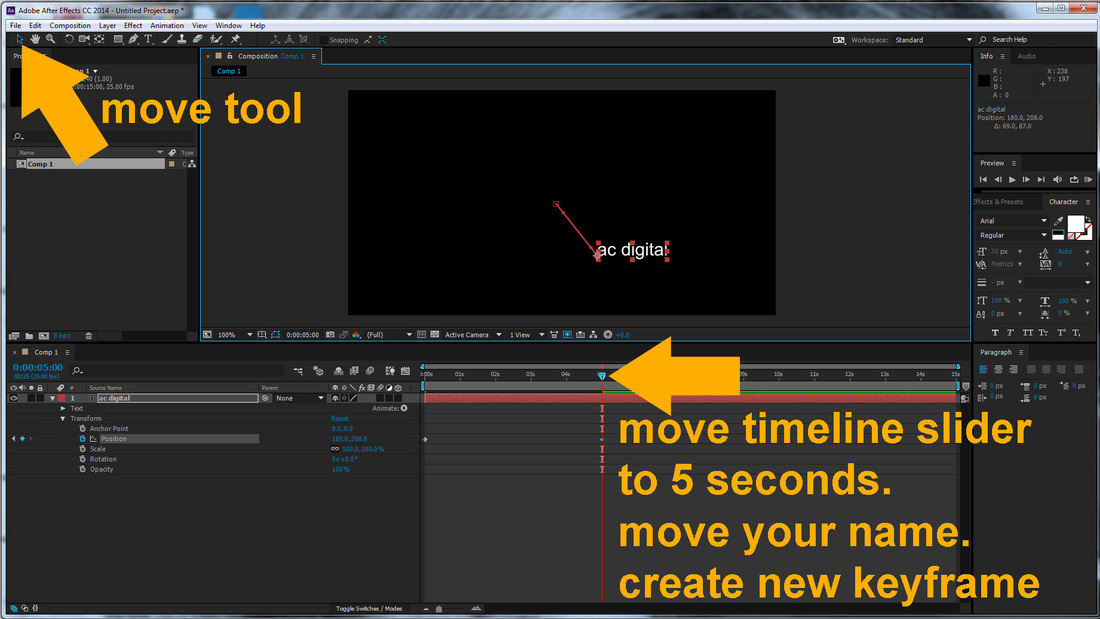
22: move timeline slider to 5 seconds
23: move your name on the movie screen to another location
24: you have set your text to a new X/Y location and created a new keyframe for this position at 5 seconds
25: move your timeline slider to 10 seconds
26: move your name on the movie screen to another location
27: you have set your text to a new X/Y location & created a new keyframe for this position at 10 seconds

28: move your timeline slider to 14 seconds
29: move your name on the movie screen to another location
30: you have set your text to a new X/Y location & created a new keyframe for this position at 14 seconds
EXAMPLE: The image below is a screenshot of After Effects with multiple layers & keyframes. As you can see, the more layers you have the more important it is to name your files correctly.
YOU ARE NOW GOING TO "RENDER" YOUR MOVIE - this process takes all your content, animations & special effects you've created in After Effects and renders it all together into 1 movie format.
31: composition > add to Media Encoder render queue
32: click "best settings"
33: set frame rate > 25 frames per second (FPS)
34: click "lossless"
35: format > quicktime
36: You can keep this at 100% quality if you want. (optional) format options 50% quality.
The reason for this is that the movie will render faster at 50% quality, speed is important when testing what your movie looks like and your not worried about 100% image quality. It might only take 5 seconds to render this, your first movie, because its only 15 seconds long with no images, movies, audio or special effects. If you make a movie that's 1 minute long with images, movies & audio might take more than 1 hour to render at 100%!
MORE RENDERING INFORMATION:
"It takes 200 days to render a full Pixar animated movie". "30 hours to render 1 single frame of Frozen"
https://www.reddit.com/r/explainlikeimfive/comments/31xj1h/eli5_how_long_would_it_take_to_render_a_full/
37: click output "comp 1"
38: re name your movie "my junior dtc movie - your name"
39: save to My Documents "Junior DTC Movie"
40: click render
41: wait for your movie to render then watch your movie
RENDERING TASK
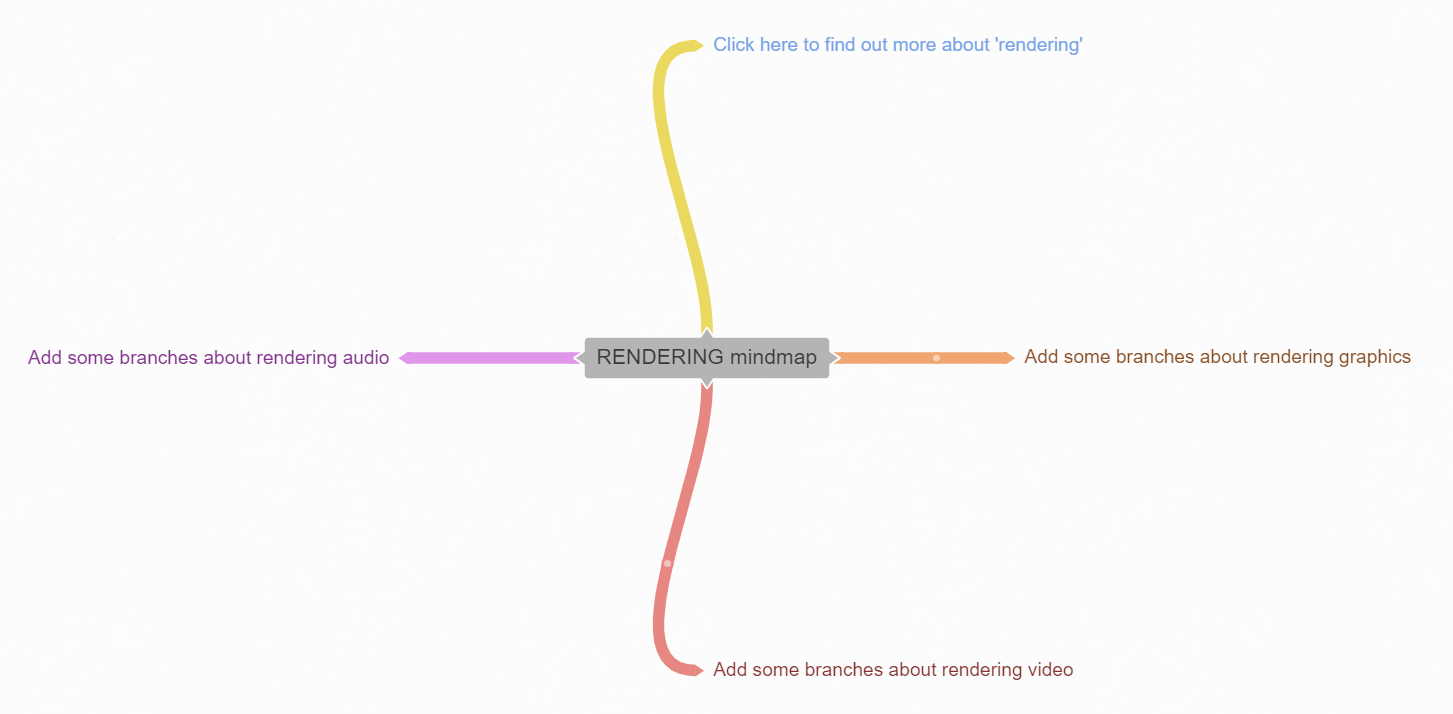
INSTRUCTIONS
Click the Coggle.it diagram and it should open in Coggle a Mind Mapping App.
If it doesn't you may need to sign-up to Coggle. Click here to sign-up.
Click the Coggle.it diagram and it should open in Coggle a Mind Mapping App.
If it doesn't you may need to sign-up to Coggle. Click here to sign-up.
TASK #2: WHANAU & STUDENT ID
Now that you have gone thru the process of animating your name...
Repeat sequence from #10 to #40 by adding & animating your whanau name & student id number.
Animate text using scale, rotation & opacity. Experiment with keyframes.
Alternatively, try animating a 15 second intro to a subject that you have studied this year.
IMPORTANT: Spend the first 5 seconds animating your text. Your text needs to be stationary from 5 to 10 seconds so that people can read the text. From 10 to 15 seconds you can re animate your text.
TIPS & TRICKS
SEQUENTIAL FILE NUMBERING
When you re render your movie, add a 1 to the end of the file > eg: "my junior digital movie - your name1"
Every time you re render your movie, add a consecutive number > eg: "my junior digital movie - your name2"
You might make 10 different versions of your movie > eg: "my junior digital movie - your name10"
ADDING CONTENT TO YOUR MOVIE
Make sure all your files are named correctly & are located in your My Documents "Junior DTC Movie" folder.
If you dont save your files in one folder your movie will not render & you will will have no movie.
You can "drag&drop" your files straight into the After Effects media content panel, OR... file > import > files
SPECIAL EFFECTS
There are thousands of special effects in After Effects. You can add any of them to each file to make your movie look cool. https://www.youtube.com/results?search_query=after+effects+special+effects+tutorial
Try some out special effects out for yourself. Use youtube tutorials to help you!
TASK #3: OFF SET TEXT
TRY THIS SPECIAL EFFECT WITH "OFFSET TEXT"
select a text file in your layers box.
animation > animate text > character offset

set your time line to 0 seconds
set opacity to 0% > click keyframe
set animator character offset to 12 (or any figure less than 24) > click keyframe
move your timeline to 5 seconds > set opacity to 100%
set animator character offset to 0 (this will reset your text to normal).
Ive added another set of keyframes at 10 seconds at 100% opacity & no text animation so that you can read the text for 5 seconds. I then added text animation & opacity keyframes at 15 seconds to fade out the text.
OPTION: Its a good idea to add a "timecode" while creating your movie, it helps with animation timing.
Create a new text layer, name it timecode. Select the layer in your layers box > effect > text > timecode.
Adjust timecode settings to suit. You can remove the timecode when you render your final movie.
|
|
IMPORTANT:
|